Every short track skater eventually works out that the blade is only half the story. Between the sole of your boot and the top of your tube sits a small set of aluminium parts that decide how high you stand, how far you can lean before the boot touches the ice, and whether your setup stays exactly where you put it through a hard heat. Those parts are your mounting cups, and for something so easy to overlook they have an enormous influence on how your skates feel.
This guide explains what a mounting cup actually does, how cup height changes your skating, how to read the engraved sizes so you can repeat a setup you like, what to do when your boot and your hardware are drilled to different bolt spacings, and how to carry out a careful mount that will not shift on you. It is written for skaters who mount their own kit at home, which is most of us.
What a mounting cup actually does
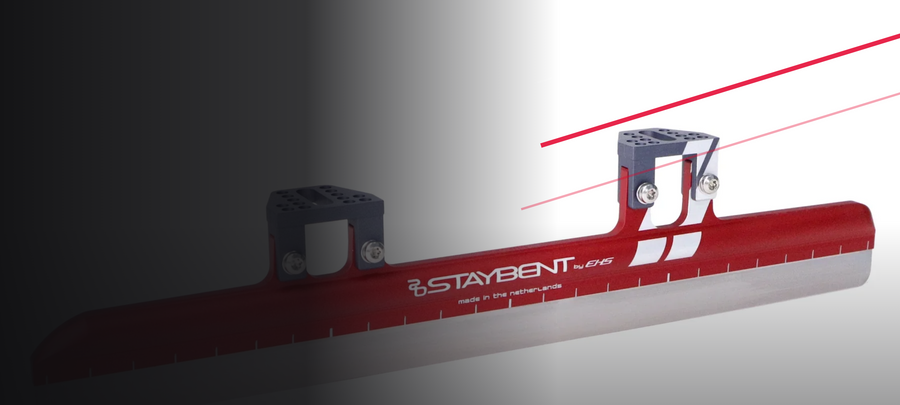
A short track blade is not bolted flat against the boot the way an inline frame is. The tube sits below the sole on two pedestals, one at the front and one at the heel, and those pedestals are the cups. The bolts pass down through the sole of the boot, into the cup, and the cup carries the tube. Everything you do on the ice, every start, every push and every corner, travels through that small stack of parts.
Cups do three jobs at once. They set the height of the blade below the boot, which is what gives you clearance to lean. They set your lateral offset, because short track blades sit to the left of the boot centre line. And they hold the whole assembly rigid, so the load you put into the ice comes back to your foot without any vagueness. A cup that flexes or works loose turns a precise blade into a guessing game.
The bolts pass through the sole into the cups, and the cups carry the tube. Every load you put into the ice travels back up through that stack.
Cup height, and what it changes on the ice
The number engraved on a cup is its height in millimetres. A taller cup lifts the tube further away from the boot, and that extra distance is what buys you lean angle. Short track corners are relentless, and the deeper you can drop into them without the boot brushing the ice, the more corner speed you can carry. This is why so many experienced skaters run more height than newer skaters expect.
Height is not free, though. Raising the blade also raises your centre of gravity and lengthens the lever between your foot and the ice, so the skate feels a little less direct and asks more of your ankle stability. Lower cups feel planted, immediate and easy to control. Higher cups feel freer and let you commit harder in the corner, once your technique is ready for it. StayBent state the trade off plainly: more height gives a deeper lean angle and more clearance in the corners, less height feels more stable and direct.
If you are new to the sport, start low and earn the height. A beginner on tall cups usually skates worse, not better, because the extra leverage arrives before the ankle strength and the edge control needed to use it. Height is something you grow into over seasons, one millimetre at a time.
A taller cup lifts the boot away from the ice, which is what lets you drop the skate further into the corner.
Standard cups or PRO cups
StayBent make two cup sets, and the practical difference between them is the range of heights they cover. The StayBent Short Track Mounting Cups come in twelve sizes in 1 mm increments, running from minus 1 up to plus 10. The StayBent Short Track PRO Mounting Cups come in thirteen sizes in 1 mm increments, running from 0 up to plus 12.
So the choice is simple. If you want the lowest step available, the standard set is the one that offers minus 1. If you want the tallest end of the range, the PRO set carries you up to plus 12. Both are precision machined from 6061 aluminium billet, both are built to be light, stiff and strong, both are anodised in a blue grey finish, and both are engraved with their size. Each order is a set of four cups, which is two per boot, so one order mounts a full pair of skates. You can also choose whether bolts come in the box or whether you reuse your existing hardware.
On price, the standard set is listed at 15,000 INR and the PRO set at 20,000 INR at the time of writing, with the adapter set at 4,000 INR. Check the product pages for the current figures before you order, because listings change. The useful point is that the gap between the two cup sets is small compared with the cost of a blade, so buy for the height range you actually need rather than for the badge.
The philosophy behind both sets is worth noting, because it runs against how a lot of skaters treat cups. StayBent build them as a permanent, reusable part of your rig rather than a throwaway item that gets binned with the packaging. Good cups outlive several pairs of blades.
The two sets overlap across most of the range, so the decision only really matters at the very bottom and the very top.
Read the engraving, and write it down
The engraved size on the side of the cup is the single most useful piece of information in your whole setup, because it lets you repeat what works. If you are simply replacing worn cups, match the number engraved on the ones coming off and your feel stays identical. If you are experimenting, move in single millimetre steps and note the number you land on.
Keep a small note in your bag with your cup height front and rear, your blade length, and how the skates felt that week. Skaters lose good setups all the time, usually after a boot change or a rebuild, purely because nobody wrote the numbers down. One line in a notebook saves a month of guessing.
Bolt spacing, and when you need an adapter
Boots and hardware are drilled to standard bolt spacings, measured centre to centre between the front and rear mounting holes. Short track boots commonly use 165 mm spacing, while inline speed patterns often use 195 mm. If your boot is drilled for one standard and your short track hardware expects the other, the holes will simply not line up, and no amount of forcing will make that safe.
The fix is a proper adapter rather than a drill. The StayBent EHS Short Track Adapter Set converts a 195 mm inline mounting pattern to the 165 mm spacing used by short track boots, so you can run short track blades on a boot that would otherwise not line up. It is a complete set that bridges the mounting points using your existing holes, with no drilling or modification needed. If you are unsure what your boots are drilled for, measure centre to centre between the holes before ordering, or send a photo of the sole and ask.
Do this measurement before you buy anything, not after your blades arrive. Two minutes with a steel rule at the kitchen table is the cheapest step in the whole process, and it decides whether you need an adapter set at all.
When the boot and the hardware are drilled to different standards, an adapter set closes the gap cleanly without drilling anything.
Mounting properly, step by step
A careful mount takes half an hour and saves months of frustration. Work on a stable table with good light, and give yourself time rather than doing it in a rush before a session.
- Check what your boot supplies. A pair of EHS Short Track Boots, for example, comes with 4 hexagon M6 by 16 bolts and 4 M6 rings for secure attachment of the blades to the boot chassis, so you may not need new bolts at all.
- Mark the centre line of the boot at the heel and at the ball of the foot, so you have a clear reference before anything is tightened.
- Set the blade with the correct offset to the left of that centre line, so the tube clears the ice when you are deep in a lean.
- Fit the cups with the engraved size facing outward where you can read it later, and start every bolt by hand so you never cross a thread.
- Snug the bolts lightly, then check the alignment again before you commit to full torque.
- Tighten in stages, working across the four bolts rather than fully torquing one at a time, so the blade cannot creep out of position.
- Stand in your skating position on a mat and feel whether the skate tracks straight and comfortable under you.
- Photograph the finished mount from the heel and from the side, so you have a visual record of the offset alongside the numbers in your notebook.
If you have changed cup height, expect the skates to feel unfamiliar for the first session or two. That is normal. Give a new height at least a few sessions before judging it, and only change one thing at a time so you know what caused the difference.
Keeping your mount honest through the season
Bolts move. Vibration, temperature swings between a cold rink and a warm bag, and the sheer load of hard corners will all work at a mounting over time. Build a thirty second check into your routine: before you lace up, put a hand on the blade and try to twist it, and once a month put the Allen key on each bolt to confirm nothing has backed off. A blade that has loosened by a fraction will feel vague long before it feels dangerous, and skaters often blame their edges when the real problem is a bolt.
Keep the area dry as well. Water that runs off the boot sits happily around the cups and the bolt heads, and in humid conditions that is exactly where corrosion starts. This matters a great deal on the Indian rink calendar, where you can walk out of a cold session into heavy monsoon air and leave a wet bag closed overnight. Wipe the tube, the cups and the sole with the same cloth you use on the steel, and let everything reach room temperature before it goes back into a bag.
Common mistakes worth avoiding
The first is chasing a professional skater's cup height. Their setup suits their body, their technique and their corner speed, and copying the number without the technique usually just makes a skate harder to control. The second is over tightening, which can strain a sole and does nothing extra for security. The third is treating cups as disposable, replacing them with whatever is cheapest and losing the ability to repeat a setup. The fourth is changing cup height and blade length in the same week, which leaves you with two variables and no way to tell which one changed the feel. Good cups, kept and reused, are one of the least glamorous and most useful purchases in short track.
Frequently asked questions
How many cups do I need?
Four, which is two per boot and mounts a full pair of skates. Both the standard and the PRO StayBent sets are sold as a set of four.
What does the number on the cup mean?
It is the height in millimetres. Standard StayBent cups run from minus 1 to plus 10 in 1 mm steps, and the PRO cups run from 0 to plus 12 in 1 mm steps. A higher number lifts the blade further from the boot.
Should I choose cups with or without bolts?
Choose the option with bolts if you want fresh hardware in the box. Choose without if your existing bolts are in good condition and you would rather reuse them. Remember that some boots, such as the EHS Short Track Boots, already include mounting hardware.
Do I need to drill my boots to fit an adapter?
No. The StayBent EHS adapter set uses the existing mounting points to bridge a 195 mm pattern down to 165 mm spacing, so no drilling or modification is needed.
How much should I change cup height at a time?
One millimetre. The sizes exist in 1 mm increments for a reason. Skate a new height for several sessions, note how it feels, and only then decide whether to go further.
Do cups wear out?
Not in the way steel does. Aluminium cups are a long lasting part, and StayBent design them to be kept and reused across several sets of blades. Replace a cup if it is visibly damaged, if a thread is stripped, or if you want a different height, not simply because it has done a season.
The small parts do the heavy work
Cups will never be the exciting part of a short track setup, but they quietly decide how much of your blade you can actually use. Pick a height that suits your current technique rather than your ambitions, write the number down, mount carefully, and check your bolts often. You can compare both cup sets and the adapter side by side in the StayBent short track accessories collection, and see what they will be carrying in the StayBent blades collection.