Most skaters buy good bearings and then quietly destroy them within the first month, not on the road but at the kitchen table. Bearings are precision components with tolerances measured in microns, and the moment you lever one out of a wheel hub the wrong way, you have put a load through parts that were never designed to carry it. The bearing may still spin. It will just never be as fast as it was.
This guide is about the unglamorous half of bearing ownership: getting them out of the wheel and back in without damage. It applies to inline speed skates, quad skates and short track boots, because they all use the same basic sandwich of bearing, spacer, bearing inside a wheel hub. Get this right and a good set of bearings will last you seasons. Get it wrong and you will be blaming the brand for something you did yourself.
Two bearings per wheel with a spacer between them, and an axle passing through all three. Everything that carries load runs through the inner race, which is the key to doing this job safely.
The one principle that prevents almost all damage
A ball bearing has an inner race, an outer race, a set of balls, a cage that holds them apart and a shield or seal on each face. The balls transmit load between the two races along a very small contact patch. Those raceway surfaces are polished to a mirror finish, and a single dent in them is permanent.
The principle is this: push or pull on the inner race, never through the balls. Any time you apply force to the outer race while holding the inner race, or the other way round, the load has to travel through the ball path. That is called brinelling, and it leaves microscopic dents in the raceway that you will feel later as a gritty, notchy roll that no amount of cleaning fixes.
Almost every bad removal technique breaks this rule. Hammering the outer edge of a bearing, prying with a flat screwdriver against the shield, or yanking a wheel off an axle sideways all push force through the balls.
What you actually need
You do not need expensive tools. A basic bearing service kit for a set of inline speed skates is short.
- The allen key that fits your axle bolts, usually supplied with the frame.
- A spare axle, or the axle already in your skate, used as a lever.
- A clean cloth and a shallow tray so nothing rolls onto the floor.
- Light skate oil for reassembly. Speedslick Pro is what we use for this.
- Optional but useful, a purpose made bearing press or puller if you service a lot of wheels.
What you should not reach for is a flat screwdriver, a hammer, or pliers. Every one of those applies force in exactly the wrong place.
Removing bearings the right way
Step one: get the wheel off cleanly
Loosen the axle bolt and slide the axle straight out. Do not tilt the wheel while the axle is still through it, because that levers the axle against the inner race at an angle. Support the wheel with one hand as the axle comes free so it does not drop.
Step two: use the axle as a lever, correctly
This is the classic tool free method and it works well when done properly. Slide the axle into one side of the wheel until the head of the axle is past the far bearing. Then tilt the axle so the head catches the inner edge of the far bearing, and lever gently outwards. The bearing pops out.
The critical detail: the axle head must catch the inner race of the bearing, not the shield or the cage. If you feel the axle scraping across the middle of the bearing face rather than gripping at the bore, stop and reseat it. Lever slowly and evenly rather than levering hard in one direction, and rotate the wheel a quarter turn between attempts so the bearing comes out square instead of cocked.
Step three: repeat and catch the spacer
With the first bearing out, the spacer will usually fall free. Keep it. Spacers are easy to lose and skating without one lets the axle bolt clamp the inner races together in a way that preloads the bearing and slows the wheel. Push the second bearing out from the empty side, again with pressure on the inner race.
On the left the force travels straight through the inner race and out. On the right it has to cross the balls, which is what leaves permanent marks in the raceway.
While they are out: clean, inspect, oil
Removal is the moment to do everything else, because you will not want to take them out again next week. Work through the bearings one at a time so shields and spacers do not get mixed up.
Inspect before you clean
Spin each bearing on a finger. A healthy bearing runs smooth and quiet with a slight resistance from the oil. Listen for grinding, feel for a notchy catch as it turns, and look for rust colour around the shield edge. A gritty bearing is often just dirty. A notchy one that stays notchy after cleaning has raceway damage and is finished.
Clean only if they are dirty
Oil binds to grit, so oiling a dirty bearing traps dust inside and makes things worse. If they are dirty, clean them properly and let them dry fully before any oil goes near them. If they run clean and smooth, a wipe of the outside and a fresh drop of oil is enough.
One drop, not a flood
Use one drop of light skate oil per bearing, through the shield or onto the balls if you have removed the shield, then spin by hand for a few seconds to spread it. Speedslick Pro bearing oil comes in a 10 ml bottle with a fine tip, which services many full sets. More oil is not faster, because a flooded bearing collects dust and drags. Ceramic bearings need this routine too, since ceramic tolerates heat and water better than steel but still needs clean oil to spin freely.
Installing bearings without cocking them
Going back in is where most of the remaining damage happens, and the cause is nearly always the same: the bearing goes in at an angle and then gets forced home.
- Sit the bearing squarely on the hub opening, shield facing outwards, and check it is flat before applying any pressure.
- Press with your thumbs on the inner race, straight down, until it seats with a soft click. If it needs real force, it is not square.
- Drop the spacer into the hub, then press the second bearing in from the other side.
- Slide the axle through to confirm everything lines up. If the axle will not pass cleanly, the spacer is misaligned inside.
- Refit the wheel and tighten the axle bolt until snug, then check the wheel spins freely. If it drags, you are overtightening against the spacer.
The overtightening trap
An axle bolt done up hard clamps the inner races against the spacer. Slightly too tight and the wheel feels sluggish for reasons that look like a bearing problem but are not. Tighten until the wheel has no side to side play, then stop. Spin it. It should carry on turning for a good while under its own momentum.
Five steps, done one wheel at a time so nothing gets mixed up or lost.
Special cases worth knowing
Bearings that will not budge
A bearing seized into a hub is usually rust or a wheel that has been ridden hard in wet conditions. Do not escalate to a hammer. Work the axle lever from alternating positions around the bore so the bearing walks out evenly, and accept that a genuinely rusted in bearing is scrap. Replace it rather than fight it, because a rusted race will never run fast again.
Quad skates and the 627 question
Not every skate uses the same bearing. Standard skate bearings are 608, measuring 8mm bore by 22mm outer by 7mm wide, which fits the majority of inline speed skate wheels. Some quad setups use 627 instead, and the two are not interchangeable. Check your axle size before you order replacements, and if you are on quads look at the Power Bearings 627 rather than a 608 set.
Mini bearing systems
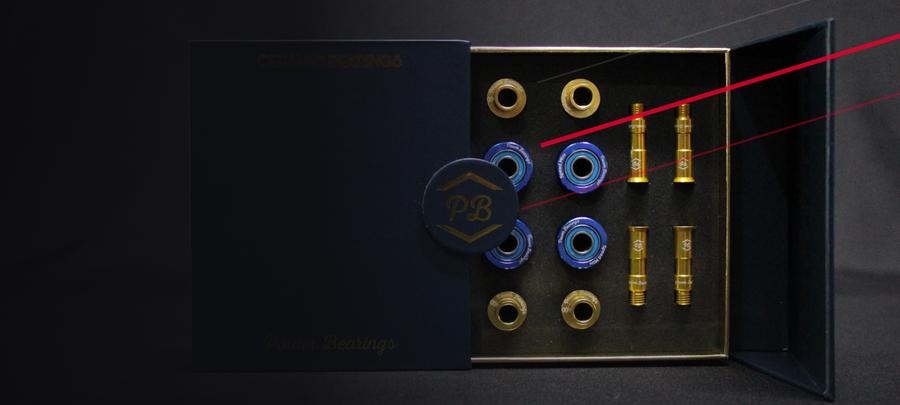
Not every bearing sits in a plain hub. The Power Bearings Speed Minimizer is a mini bearing racing system with its own aluminium axles, one piece outer aluminium adaptors and in line spacers designed to work as a matched unit. Service it as the system it is, keeping the matched components together, rather than treating the parts as generic bearings.
How often should you be doing this?
Less often than the internet suggests. Every removal carries a small risk, so there is no point pulling bearings on a schedule. Take them out when the roll goes short, when you hear grit, after a genuinely wet or dusty session, or when you are changing wheels anyway. Skaters training on dusty Indian outdoor tracks will be in here far more often than someone rolling on a clean indoor floor.
Frequently asked questions
Can I use a screwdriver to pop bearings out?
You can, and plenty of people do, but it is the single most common cause of damage because it puts force on the outer race and the shield. The axle lever method costs nothing and does not carry that risk.
Do I need a bearing press?
No, but it helps if you service many wheels. A press applies even pressure on the inner race by design, which removes the human error from the job. For one pair of skates, a careful axle lever is fine.
Which way round do the shields face?
If your bearing has one shield only, that face goes outwards where dust arrives. If it has two, orientation does not matter mechanically, though many skaters fit them the same way for tidiness.
Do I have to remove the shields to oil them?
Not usually. One drop through the shield edge, then a hand spin, is enough for routine maintenance. Removing shields is for a proper clean of a dirty bearing, and rubber seals should be prised off gently at the retaining ring, never bent.
My bearing still feels rough after cleaning. What now?
Replace it. A cleaned, dried and oiled bearing that stays notchy has raceway damage, and no service will bring it back. You can compare the options in the Power Bearings collection, from steel sets through to the Swiss Ceramic, which uses silicon nitride ceramic balls in a precision race for skaters whose engine has outgrown their kit.
The takeaway
Bearings do not usually die of old age. They die of bad removal, dirty oil and overtightened axles. Push on the inner race, keep the spacer, use one drop of oil, seat everything square and stop tightening once the play is gone. Do that and even a mid range set will outlast a premium set treated carelessly.