Ask a group of Indian skaters what ruins their training and almost nobody says fitness. They say the surface. So this guide is about how to skate on rough roads: the cracks, the gravel, the speed breakers, the tar strips and the wet patches that turn a good session into forty minutes of flinching. Rough road skating is a skill in its own right, and it is learnable. Skaters who have it look calm on surfaces that make everyone else stiffen up, and they are not braver, they are simply reading the road earlier and moving their weight at the right moment.
Two things decide how a rough road feels under you. The first is what you do, which is where almost all of the improvement lives. The second is what you are rolling on, which matters but matters less than most skaters assume. We will deal with both, in that order, because a skater with good technique on average wheels will out skate a nervous skater on perfect ones every time.
Why rough roads are a technique problem first
An inline speed wheel is a small, hard, narrow thing. It has one contact patch roughly the size of a thumbnail, and it has no suspension at all. Everything the road does arrives at your foot. A car tyre bridges a two centimetre gap without the driver noticing, while a 110 mm wheel dropping into that same gap can stop dead or snatch sideways, and your body keeps travelling at whatever speed it was doing.
That is the whole problem in one sentence. You cannot absorb a hazard with equipment, so you absorb it with your legs, your timing and your choice of line. The good news is that each of those costs nothing.
There is a second, slower cost too. A rough surface sends a constant buzz up through the frame into your foot, your shin and your lower back. Over an hour, that vibration fatigues you in a way that smooth tarmac never does, which is why a 20 km session on a patchy road feels harder than 25 km on good concrete. Managing that fatigue is part of the skill.
Reading the road before you reach it
Everything else in this guide depends on seeing the hazard early. Skaters who struggle on rough roads almost always have their eyes in the wrong place, looking three metres ahead at their own wheels.
The scanning pattern
Run your eyes on a loop with three distances. Far, about fifteen to twenty metres ahead, is where you choose your line and spot the big stuff: the broken edge, the patch of gravel, the hump. Middle, around five to eight metres, is where you commit and set your feet for whatever is coming. Near, right in front of your wheels, you barely use at all, and only for the last confirmation.
Most skaters have that pattern inverted. Deliberately lifting your eyes to the far distance for a whole session feels odd for ten minutes and then transforms how smooth you are, because every decision arrives with time attached.
Choosing the smooth ribbon
Indian roads are rarely uniformly bad. They are usually a mix, with a smoother ribbon somewhere in the lane. Often it sits in the wheel tracks that traffic has polished, sometimes just inside the lane marking, sometimes in the middle where the two halves of a resurfacing meet. Find that ribbon on your regular loop and learn where it moves. On a route you skate every week you should know, without thinking, that the good line crosses from left to right after the second junction.
One warning. The smoothest strip is sometimes the painted line itself, and paint is slick, especially when damp. Use the paint as a reference, not as a running surface.
A crack that you meet at a shallow angle has time to swallow the wheel and steer it. The same crack met close to square is just a short bump.
How to cross a crack, a joint or a tar strip
This is the single highest value skill on broken tarmac, because longitudinal cracks are everywhere and they are the ones that actually put skaters down.
Angle first
Cross a crack as close to square as you can manage. A wheel meeting a gap at ninety degrees drops in and climbs out in the space of a few centimetres. The same wheel meeting the same gap at twenty degrees sits in the groove, and because the groove has walls, it steers your skate for you. That is what the sudden snatch to one side actually is.
You rarely get a perfect ninety degrees, and you do not need it. Going from a very shallow angle to a merely awkward one removes most of the risk. Make the change early and smoothly rather than with a flick of the ankle at the last second.
When you cannot change the angle
Sometimes a crack runs exactly where you need to skate. Three things help. Shorten your stride so your wheels spend less time out to the side where you have least control. Keep both skates moving, because a gliding wheel that catches is far more unsettling than one that is being driven. And carry your weight slightly more over your heel wheels for the crossing, so the front wheel can be light when it finds the gap.
The thing not to do
Do not try to jump it. Hopping both skates off a rough road at speed is a skill that takes a lot of practice to do safely, and the landing is unforgiving on a surface you cannot read. Step over, unweight, or change the angle. Those three cover almost everything the road offers.
Speed breakers, kerb lips and sudden steps
A speed breaker is not a hazard if you are ready for it, and it is a genuine problem if you arrive at it low, loaded and surprised.
Unweighting, in three beats
Unweighting means briefly taking load off the wheels at the moment they meet the obstacle, so the skate can move up and over instead of being driven into it.
- Approach. Stay in your normal low position and keep rolling. Do not stand bolt upright, because a tall stiff body has nowhere left to go.
- Soften and rise, just slightly, as the front wheel reaches the hump. Think of letting your hips float up a few centimetres while your ankles and knees go loose. The feet become light.
- Let the legs follow the shape of the obstacle, then settle back into your position and put the weight back on once both skates are past.
Rolled asphalt speed breakers are easy once this is automatic. The painted strip type, a row of narrow raised bars, is worse because it hits you repeatedly, so take those slower and with a wider stance for stability. A hard square step, such as a kerb lip or the edge of a new resurfacing, deserves respect. If it is more than about a wheel radius tall, step off and walk it. Nothing in a training session is worth a broken axle or a bent frame.
The whole movement lasts under a second. You are not jumping, you are just taking the load off at the moment the wheels need to move.
Gravel, sand and loose grit
Loose material is different from a crack, because the danger is not a snatch, it is a total loss of grip for as long as you are on it. Hard speed wheels float on top of fine grit rather than cutting through it.
The rules are simple. Go around it if you safely can, deciding early from your far scan. If you must cross it, cross in a straight line with no push, no lean and no steering, with your weight balanced and your feet a little wider than usual. Do not try to turn, brake or stride on gravel. You are a passenger for a metre or two, and then you are back on tarmac and can skate again.
Gravel also collects in predictable places, which makes it easy to plan for: the inside of corners, the mouth of side roads where vehicles drag it out, the edge strip next to the kerb, and anywhere a construction site has been active. Monsoon months move grit around constantly, so a loop you know well in February needs rescanning in August.
Wet patches, paint and diesel
Water removes grip and carries dirt into your bearings, so a genuinely wet road is a day off or a dryland session. The more common problem is the patch: a damp shaded stretch, a dried puddle rim, a smear of diesel outside a workshop, a drain cover, or a painted arrow.
Treat all of these as zero grip for the time it takes to cross them. Straighten up, stop pushing, keep your feet under you, and resist the urge to correct anything while you are on the slick patch. Most slips happen because a skater tried to steer mid patch. The surface gives you nothing to steer with, and the correction becomes the crash.
Metal is the worst of the lot. A drain cover or a steel plate over roadworks is slick dry and glassy wet, and the edges are usually a step as well. Go around them as a rule, not a preference.
Why wheel size and compound change what the road feels like
Technique does most of the work, but the setup decides how much of the road reaches you in the first place, and there is real physics here rather than marketing.
Nothing about the road changes. The larger diameter simply spans more of the gap, which is why big wheels feel calmer on broken tarmac.
Compound
A softer urethane deforms around small imperfections instead of skipping over them, which gives more grip and soaks up more of the buzz. The trade is a little roll and a little life. Of the two firmness options we stock across the race ranges, the XFirm compounds are the softer and grippier choice, and they are the sensible default for patchy Indian tarmac. The JUNK Road Reaper 110 XFirm sits at 84 to 86A, against 86 to 88A for the XXFirm version of the same wheel, so going XFirm is a deliberate step towards grip rather than a downgrade.
MPC takes a different route to the same end. The MPC Black Magic XFirm uses MPC's patented MTech build, a softer inner ring sandwiched inside a harder outer layer of urethane, so the soft heart flexes for grip while the harder body keeps the wheel rolling and lasting. On a surface that is constantly working the wheel, that construction is doing something useful. You can line up the options side by side in the wheels collection and pick by the surface you actually train on rather than the one you wish you had.
Diameter and frame
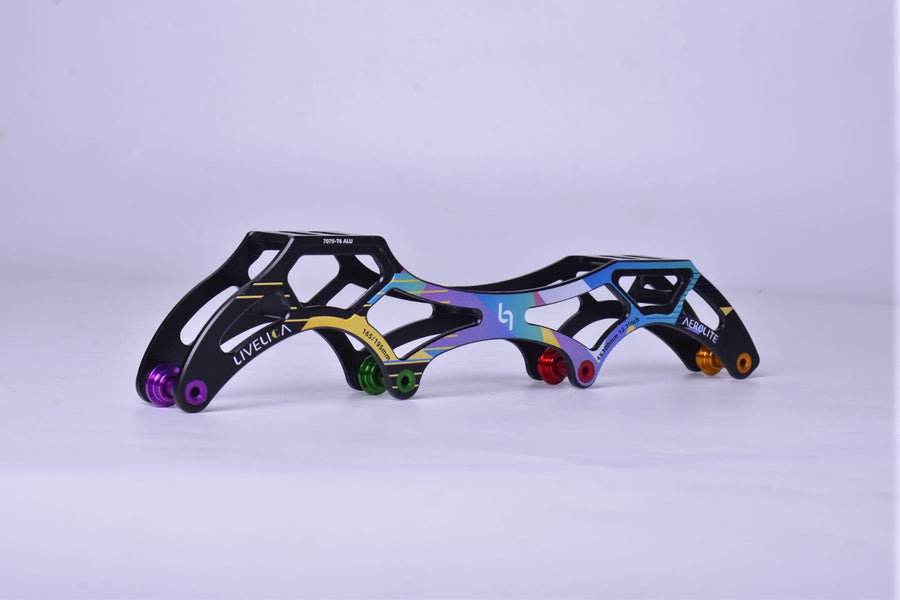
Diameter is the bigger lever. A larger wheel meets the far side of a gap higher up and climbs out at a shallower angle, which is exactly why 125 mm setups feel so composed on broken roads. If your training is mostly road and mostly rough, a big wheel platform such as the LiveLica Aerolite 3x125 is worth serious thought. It carries three 125 mm wheels on a 12.6 inch platform, weighs 155 grams in 7075 T6 aluminium, and is drilled for both 165 mm and 195 mm mounting, with axles and spacers in the box.
Three wheels or four is a genuine choice rather than a hierarchy. A triskate is lighter and quicker to turn, which helps when you are picking your way between hazards. Four wheels give you more contact and more stability, which helps when you are committed and driving hard. Plenty of road skaters own both and choose by route.
What rough roads do to your bearings
Dust is the hidden tax on rough road training. Grit works past the shields, and once it is inside, every rotation grinds a little more. You will feel it as a roll that dies early rather than as a dramatic failure.
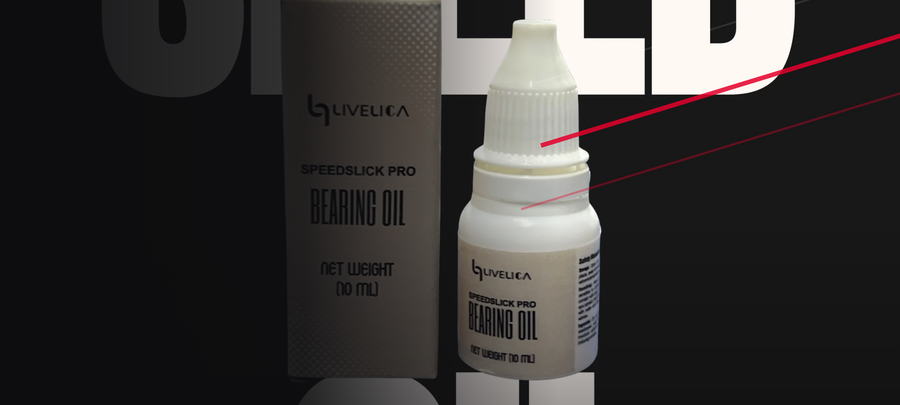
Build the habit of wiping the wheels and frames down while the skates are still in your hands after a session, and clean and re oil on a rhythm rather than waiting for the noise. One drop of Speedslick Pro Bearing Oil per bearing is the full dose, and more is genuinely slower, because a flooded bearing collects dust and drags. Oil only a clean, dry bearing, since oil binds to grit. If you are choosing a set for dusty training, the options across the speed bearings collection cover everything from steel through to ceramic, and the honest advice is that cleaning habits beat specification for anyone training on Indian roads.
The fatigue nobody plans for
Finally, respect what a rough surface does to you over an hour. The vibration tightens your calves and your lower back, your feet get hot, and your hands grip harder than they need to. Your technique degrades before your fitness does.
Build the session around that. Put the quality work in the first half while you are still smooth, use the smoothest part of your loop for intervals, and treat the rough sections as easy rolling rather than places to force watts. Shake the hands out, change your arm position now and then, and if your form has gone, finish. A rough road session that ends ten minutes early with good technique is worth more than one that ends on time with a stiff back and bad habits rehearsed.
Frequently asked questions
What wheels are best for rough roads?
The softer of the compounds available in your chosen wheel, in the largest diameter your frame takes. Softer urethane absorbs more of the small stuff, and bigger diameter bridges more of the big stuff. Grip and comfort are worth more than the last fraction of roll on a surface that is constantly interrupting you.
Should I cross a crack slowly or quickly?
Neither extreme. What matters is the angle and keeping both skates driving rather than drifting. Crawling across does not help, because a slow wheel still drops into the groove, and it leaves you with less stability.
Can I skate on a gravel road on speed skates?
Not usefully. Hard, narrow speed wheels need a firm surface to work with. You can cross a gravel patch in a straight line, but a whole route of loose material is not a speed skating route, and trying to make it one wears your wheels and bearings out quickly.
Is it better to jump over cracks and bumps?
No, not for most skaters. Jumping on a road you cannot read puts the landing somewhere you have not inspected. Changing your angle and unweighting handle almost everything, and both are far easier to learn.
How do I stop my feet going numb on rough roads?
Loosen the top of your lacing slightly, stand tall and roll your ankles a few times every ten minutes, and vary your position rather than holding one deep tuck for the whole session. A softer compound and a larger diameter also reduce the buzz reaching your foot in the first place.
How often should I clean my bearings if I train on dusty roads?
By feel rather than by calendar. When the roll starts to feel short or a bearing sounds gritty, clean it, dry it fully and add one fresh drop of oil. Skaters training in dust and after rain will do this considerably more often than anyone skating indoors.
The short version
Lift your eyes and find the smooth ribbon. Cross cracks as square as the road allows. Unweight over the bumps instead of bracing against them. Go straight and passive across gravel and anything slick. Then let your setup help, with a softer compound and the biggest diameter your frame will take, and keep your bearings clean because the road is trying to fill them. None of it is glamorous, and all of it turns a road you tolerate into a road you can actually train on.