Choosing a frame is the part skaters enjoy. Building the skate is the part that decides whether the frame ever feels the way it should. A first class frame bolted on crooked, running wheels with badly seated bearings and over tightened axles, will feel slower and vaguer than a modest setup put together with care. The good news is that assembling an inline speed skate is genuinely simple once somebody shows you the order of operations and the small number of places where people go wrong.
This guide walks through the whole build. We start with what actually comes in the box, then work through fitting bearings and spacers into your wheels, setting axles without crushing anything, bolting the frame to the boot, and finally the part most skaters never touch, which is where the frame sits under your foot. Do all of it patiently once and your skates will feel planted, quiet and honest for the rest of the season.
What comes in the box, and what you still need
Every LiveLica Aerolite frame ships with the Allen key you need for mounting and adjustment, plus spacers and axles. That covers the frame side of the build completely. What it does not include is wheels and bearings, because those are personal choices that depend on your surface, your discipline and your budget.
Count your parts before you order. A standard four wheel setup needs eight wheels for the pair, which is four per skate, and sixteen bearings, because every wheel takes two. A three wheel triskate setup such as the Aerolite 3x125 needs six wheels and twelve bearings. A set such as the JUNK Road Reaper 110 XFirm comes as a full set of eight wheels, so one set covers a pair of four wheel skates. Bearings are ordered separately from the speed bearings collection. Add a bottle of oil, a clean cloth and a flat table and you have everything.
Two bearings and one spacer live inside every wheel, so the bearing count is always double the wheel count. Work it out before you order and you will not be one bearing short on build night.
The 608 bearing, and why the size matters
Inline speed skating runs on the 608 bearing, which measures 8 mm bore by 22 mm outer diameter by 7 mm wide. That 8 mm bore is what slides onto your axle, and it is the number that quietly makes everything compatible. Any 608 bearing from the collection, steel or ceramic, entry level or elite, will fit any speed wheel and any Aerolite frame. It is one of the few genuinely universal standards in skating, and it means you can upgrade bearings later without changing anything else.
Because two bearings sit in each wheel hub facing each other, a spacer sits between them. That spacer is not optional and it is not decorative. It sets the exact distance between the two bearings so that when you tighten the axle, the clamping load lands on the spacer rather than crushing the bearings inward against each other. Skip the spacer or fit the wrong one and you will tighten your wheels into a slow, grinding mess and blame the bearings for it.
The axle passes through both frame walls and both bearings. The spacer between them is what stops the axle squeezing the bearings out of shape.
Fitting bearings into wheels
Press the first bearing squarely into the hub with your thumbs, keeping it flat so it enters straight rather than at an angle. Drop the spacer in behind it, then press the second bearing in from the other side. The bearing should seat flush with the hub face. If it goes in stiffly, stop and check that it is not tilted, because forcing a cocked bearing damages both the hub and the bearing.
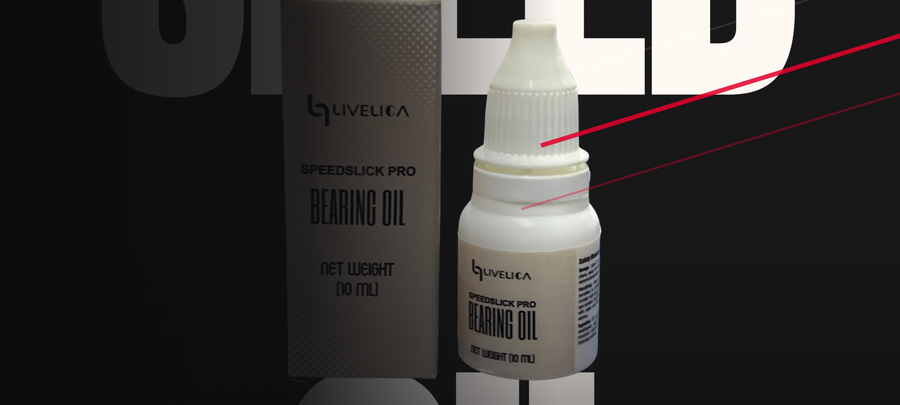
Oil before you build, not after. Add one drop of Speedslick Pro Bearing Oil to each bearing and spin it by hand for a few seconds so the oil spreads evenly, then wipe any excess. One drop is the correct amount. More oil is not faster, because a flooded bearing collects dust and drags. If your bearings are already dirty, clean them and let them dry fully first, since oil binds to grit and traps it inside.
Axles, and the most common mistake in skating
Now slide each wheel into the frame and fit the axle through. Bring the axle up to firm, then stop. This is where more skaters lose speed than anywhere else in the build. Because the spacer sets the internal distance, tightening far beyond firm does not make anything more secure, it simply loads the bearings and shortens their life.
The check is easy. With the axle tightened, spin the wheel by hand. It should turn freely, quietly, and keep turning for several seconds. If it stops abruptly or feels notchy, back the axle off slightly and spin again. Work through every wheel the same way, then go back and confirm each axle a second time once the skate is fully built, because the first pass often settles.
Bolting the frame to your boots
Frame mounting is measured centre to centre between the front and rear bolts, and modern inline speed boots use one of two standards, 165 mm or 195 mm. Every frame in the Aerolite range is drilled for both, so the Aerolite 4x110 and its stablemates bolt onto either standard and stay useful if you change boots later. Check what your boots are drilled for before you order rather than after, and message us if the holes on your boot are not marked.
When you bolt up, start both bolts by hand, snug them lightly, then tighten in stages rather than fully torquing one and then the other. Tightening one bolt completely first tends to pull the frame slightly out of position as the second one comes down. Firm is enough. These are aluminium threads in a light structure, and gorilla strength buys you nothing except a stripped thread.
Know the platform you are bolting on
Frame length changes how the finished skate behaves, and it is worth knowing the number for the frame in your hands before you start adjusting anything. Across the Aerolite range the platforms run as follows, every one of them machined from 7075 T6 aluminium and drilled for both mounting standards.
- Aerolite 4x90, four 90 mm wheels on a 10.86 inch platform, 124 grams, the low and agile track setup
- Aerolite 4x100, four 100 mm wheels on a 12.1 inch platform, 148 grams, the versatile all rounder
- Aerolite 3x125, three 125 mm wheels on a 12.6 inch platform, 155 grams, the big wheel triskate
- Aerolite 4x110, four 110 mm wheels on a 13.2 inch platform (335 mm), 159 grams, the full length race frame
The longer the platform, the more a small change in position is felt, which matters for the next section.
Frame position, the adjustment most skaters ignore
Frames do not have to sit dead centre under the boot. The mounting slots allow lateral movement, and where you set the frame changes how naturally you find your edges. Most skaters get on best with the frame sitting slightly toward the inside of the foot, because that supports the natural outward push of a skating stride and stops the skate rolling onto its outside edge when you stand relaxed. Skaters with a strong natural pronation or supination may need to move further one way to feel neutral.
Small sideways moves change how easily you find a clean edge. Start centred, then adjust in tiny steps if the skate does not feel neutral underfoot.
Fore and aft position matters too. Moving the frame forward puts more of the platform behind the ball of your foot and tends to feel quicker and more aggressive, while moving it back feels more stable and forgiving. This interacts with frame length: on a long race platform such as the 13.2 inch 4x110, a small shift changes the feel noticeably, simply because the platform reaches further at both ends.
Shifting the platform forward or back under the boot changes the balance of the skate. Move in small steps and test each change over a full session.
Whatever you change, change one thing at a time and skate on it properly before deciding. Frame position is felt over twenty minutes of skating, not in the first ten metres, and a setup that feels odd for the first lap often feels perfect by the end of the session.
The first ride, and the checks that follow it
Take a short, easy skate on a fresh build rather than heading straight into intervals. Roll gently, feel whether the skate sits neutral underfoot, and listen. New wheels and freshly seated bearings usually go quieter after the first few kilometres as everything settles.
When you get home, put the Allen key on every axle and every mounting bolt again. This first check after the first ride catches almost everything that is going to move. After that, a monthly check is plenty for most skaters, along with a look at wheel wear so you can rotate before the profile goes badly uneven.
Matching wheels to the frame you have built
The final piece is choosing wheels that suit your frame and your surface. Diameter must match what the frame is designed for, so a 4x110 takes 110 mm wheels and a 3x125 takes 125 mm, and hardness should suit your road. The Road Reaper 110 XFirm sits at 84 to 86A, which is the grippier option and suits hard, smooth, dry race surfaces, while the harder XXFirm at 86 to 88A trades a little grip for more roll. You can compare the range in the JUNK wheels collection, and see every frame option in the LiveLica AI Frames collection.
Frequently asked questions
How many bearings do I need for a full setup?
Sixteen for a standard pair of four wheel skates, which is two per wheel across eight wheels. A pair of three wheel triskates needs twelve. They are all 608 size, 8 mm bore by 22 mm outer by 7 mm wide.
Do I really need spacers?
Yes. The spacer sets the distance between the two bearings in each hub so the axle clamps against the spacer rather than squeezing the bearings. Aerolite frames come with spacers and axles included.
How tight should the axles be?
Firm, then stop. Spin the wheel afterwards. It should turn freely and quietly for several seconds. If it stalls or feels notchy, ease the axle off slightly and check again.
Which mounting standard do Aerolite frames use?
Every Aerolite frame is drilled for both 165 mm and 195 mm, the two standards on modern speed boots, so it fits either without an adapter. Confirm which one your boots use before ordering.
Where should I start with frame position?
Start centred, or very slightly toward the inside of the foot, and skate on it for a few sessions. Only adjust if the skate consistently feels like it wants to fall onto one edge, and move in small steps.
Should I oil bearings before or after fitting them?
Before. Add one drop per bearing, spin it by hand to spread the oil, wipe off the excess, then press it into the hub. Clean any dirty bearings and dry them fully before oiling.
Build it once, properly
None of this takes special tools or special skill. It takes an hour, a flat table and the willingness to stop at firm instead of tight. Seat the bearings straight, use the spacers, keep the axles honest, mount the frame in stages, and give yourself permission to move the frame a few millimetres until the skate feels neutral under your foot. Do that and every rupee you spent on the frame, the wheels and the bearings actually reaches the road.